# ows-moneyhub
## Requirements
* Python 3.11
* [Docker](https://www.docker.com/)
## Installation
Copy the [shadow environment file](.env.shadow) and modify the [environment](.env) file with your credentials:
```shell
cp .env.shadow .env
```
Copy the [shadow pre-commit file](.pre-commit.shadow), paste it into the `.git/hooks` directory,
then make it executable:
```shell
make hooks
```
Run the `env` make target to setup the environment, and install dependencies. It will also set `venv`
to be your interpreter:
```shell
make env
```
Alternatively you can run all the steps manually:
```shell
python -m venv env
source env/bin/activate
pip install --upgrade pip
pip install -r requirements.txt
pip install -r requirements-dev.txt
```
## Running
When all dependencies have been installed, you can run the flask application on your local instance by running:
```shell
make dev
```
or
```shell
python dev.py
```
All make commands will automatically install all dependencies in an virtual environment folder called env. You can activate a virtual environment by running `. env/bin/activate` or `source env/bin/activate`.
By using the development server, you will have access to specific features that are not necessarily available in production, such as the exception tracer.
# Hooks
Our `.pre-commit.shadow` file houses our pre-commit hooks which will be copied and pasted into the
`.git/hooks` directory via the `make hooks` command.
1. **generate_openapi()** - this script generates the `spec/ows_moneyhub-1.0.0.yaml` file if
breaking changes occur in either the `/handlers` or `/schemas` directories. It works by using
GitPython to check for file changes, then utilises FastAPI's `get_openapi()` method to
generate the OpenAPI spec in the form of a dict. We then manipulate each endpoint's
description using Regex. See [here](https://www.notion.so/Sherlock-Auto-generating-OpenAPI-script-2727fa8382814e20868eefc509fc7837?pvs=4) for more details.
## Feature Flags
In order to implement the new feature behind the feature flag, you can use this utils function [is_feature_enabled](https://github.com/theorchard/ows-moneyhub/blob/master/moneyhub/utils/features.py#L6). This function accepts the name of the feature (created from the [split.io](https://app.split.io/login) dashboard) and attributes such as identity_id, account_id etc.
```
is_feature_enabled(FEATURE_FLAG_NAME)
```
For this to work locally, make sure to include `SPLITIO_API_KEY` environment variable in `.env` file then pass the [Authorization](https://github.com/theorchard/ows-moneyhub/?tab=readme-ov-file#authorization) token in request headers.
OR, you can create a `.split` file in the directory and add the file path in '.env' file.
```
SPLIT_FILE_PATH='.split'
```
The format of the file is one flag per line separated by a space and either `on` or `off`:
```
moneyhub_very_cool_feature on
moneyhub_less_cool_feature off
moneyhub_other_feature on
```
# Authorization
We enforce [authorization](https://www.notion.so/How-Security-and-Authorization-works-at-Sony-Music-PDE-bd6a13502041413c866b7bfd4c0a7d9c?pvs=4)
on our microservice in both `QA` and `Prod` environments. This means in order to connect to our
microservice in those environments, you will need to add `Authorization: Bearer [JWTTokenString]`
as part of your request headers each time you try to send a request. You can get a JWT token by
taking one from the response sent back from GraphQL. See below.
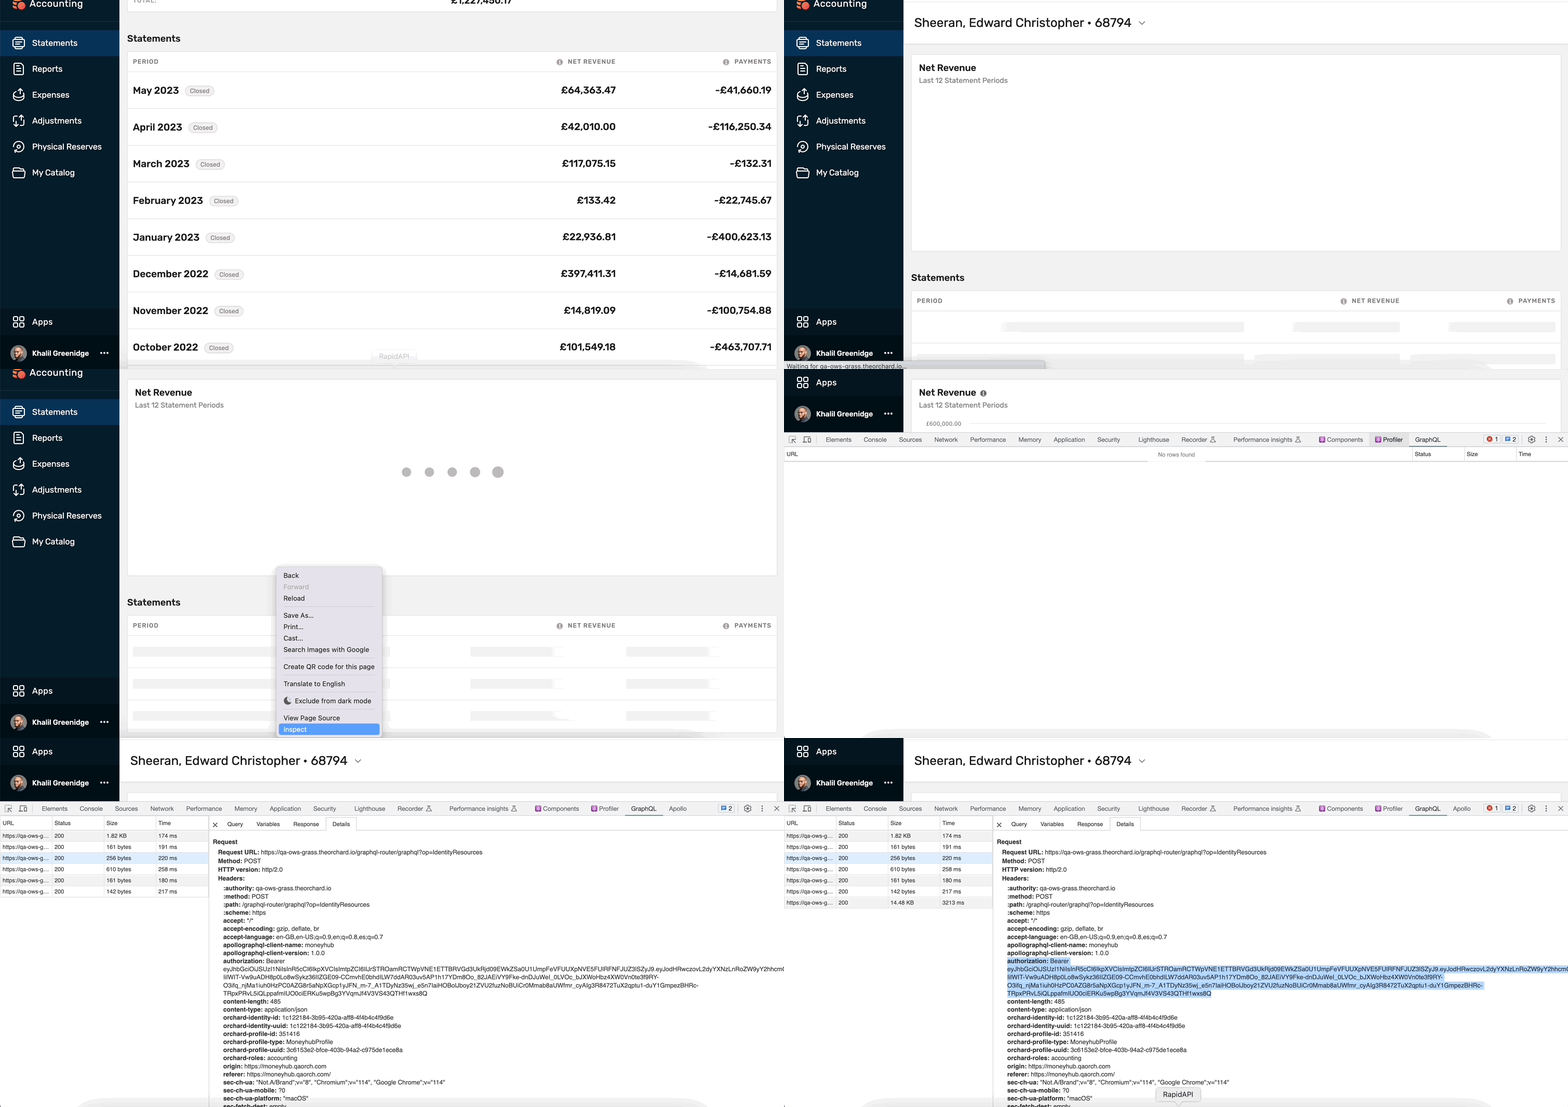
Authorization is not enforced by default in the `Dev` environment. To enable this in the `Dev`
environment, you simply need to set `JWT_AUTH_ENABLED=True` in your `.env` file. Although JWT
tokens usually expire after an hour, you will only need to change your JWT token in your
Authorization header once a year in the `QA` environment. This was accomplished by setting the `AUTH_LEEWAY` environment variable
to allow expired tokens for the said duration.
# Snowflake SSH Authentication
To connect to Snowflake, you will need to have SSH keypair authentication set up. Password authentication is no longer supported for Snowflake connection. Details for how to get this set up can be found in the
[official Snowflake documentation](https://docs.snowflake.com/en/user-guide/key-pair-auth) but are recreated here as well for convenience.
You will need to setup an SSH key on your machine:
```shell
mkdir ~/.ssh/snowflake && cd ~/.ssh/snowflake # recommended
openssl genrsa 2048 | openssl pkcs8 -topk8 -inform PEM -out rsa_key.p8
openssl rsa -in rsa_key.p8 -pubout -out rsa_key.pub
```
You will need to update your .env file with the following variables:
* Set `SNOWFLAKE_PRIVATE_KEY_PATH` to the path to your SSH key
* Set `SNOWFLAKE_KEY_PASSPHRASE` to the passphrase you used when creating the key (if necessary)
Once you've created the public key, you can self service adding registering it to Snowflake by making the appropriate entry in [this terraform file](https://github.com/theorchard/terraform-infra/blob/master/prod/snowflake/orchard/users/users.auto.tfvars). This process is quite similar to how to register a service user, so the [Notion page explaining those steps](https://www.notion.so/How-to-create-a-Snowflake-service-user-ac695c4deace461b8428e30fe225000e) may provide useful reference.
Note that the `SNOWFLAKE_PRIVATE_KEY` environment variable should be set to empty for local dev. This is for use within the deployed environment.
## Docker (Colima)
We use colima as our docker environment. If you have not set up colima yet, you can follow the instructions [here](https://www.notion.so/Migrating-from-Docker-Desktop-30297177520f80b78fecf2b3d90314e2).
Before running any docker commands, make sure to start the colima environment by running `colima start` in your terminal.
### Redis
#### 1. Getting Started
To spin up the Redis container, simply run:
```shell
docker compose up moneyhub-redis
```
You can then use `redis-client` or [Redis insights (GUI)](https://redis.io/docs/connect/insight/) to connect to it.
#### 2. Enable Redis
To enable Redis for dev, set the following environment variables in your `.env` file:
```python
REDIS_HOST=127.0.0.1
REDIS_PORT=6379
REDIS_ENABLED=True
```
#### 3. Troubleshooting
Further information about the caching strategy (including how to remove cache entries) can be found in the following [Notion page](https://www.notion.so/Caching-Strategy-in-Customer-Accounting-53ed704352d04cc588dbebfa685cc7b5).
# Testing
Running both **unit** and **integration** tests **requires** running a Docker image that is updated with all
the changes in the [database repository](https://github.com/theorchard/database/).
#### 1. Generate AWS Credentials
The docker image needs to be fetched from our AWS ECS register. In order to fetch this
image you must generate PROD AWS credentials (using [awsume](https://www.notion.so/AWS-Access-f841b9dd815d4443a80e96a86c92cd2f?pvs=4#f11f08d09f16493a8a3e9dbf38d87164)).
After installing awsume, you can run:
```shell
awsume prod
```
#### 2. Pull Docker Images
```shell
make sync_docker
```
#### 3. Run Docker Image
Then whenever you are running the tests you need to ensure the Docker container has started first:
```shell
make start_db
```
## Unit Tests
The `lint` make target is used for linting the code, `type_check` to verify type hints, and `test` for running the unit tests.
However, before you run `test`, make sure you have [set up docker](#testing) and run the container
first.
```shell
make lint
make type_check
make test
```
To run the commands without Make you can use the following commands to lint, check types, and run the tests respectively:
```shell
flake8 moneyhub/ tests/ dev.py application.py
mypy --strict moneyhub
py.test tests/unit/
```
**Running with PyCharm**
If you're running tests using the PyCharm IDE, then you must edit all of your run configurations by setting your
**Working Directory** to the root folder, and setting your interpreter to use the **virtual environment**. See [here](https://www.jetbrains.com/help/pycharm/creating-run-debug-configuration-for-tests.html) for help on doing so.
## Integration Tests
1. First, you will need to add an [authorization token](#authorization) to your `.env` file. Be
careful to only include the hash - not the _Bearer_ part.
```
BEARER_TOKEN=yourTokenHash
```
2. You can then spin up the `ows-moneyhub` (and `moneyhub-mysql` indirectly) containers by running the
following:
```shell
docker compose up ows-moneyhub
```
3. Then run the integration tests:
```shell
pytest tests/integration/test_api.py tests/functional/
```
### Running in Docker
Alternatively, you can build and run integration tests in docker (colima) in one go:
```shell
make integration_job
```
Other targets explanations (used within integration_job target):
```shell
make sync_docker
# Pulls latest required container images from ECR
```
```shell
make jenkins_env
# brings existing containers, networks and so on down first
# clears the environment
# fetches latest images from ECR
```
```shell
make test_integration
# runs found pytest scenarios against docker stack
```
## Notes
Windows users will not be able to use the make commands as Make is a Unix util. Windows users can attempt to install GNUWin to get this functionality.
# Troubleshooting
### Docker Issues
If you have encountered an issue with your docker image refusing to sync and/or failing to run
the liquibase migrations, causing your tests to fail, try this command: `clean_docker`
Alternatively, you can run these steps:
* Run `make docker_down`
* In the Docker dashboard delete all the images
* Run `docker system prune -f && docker volume prune -f`
* Run `make sync_docker`
* Run `make start_db`
If you have received an `Error 18` message, it may mean that the credentials are not pasted into
the terminal before pulling the container image. See [Docker, step 1](#docker) for more details.
# Appendix
## Running Tests With Secrets Manager
If a circumstance arises where you need to connect to secrets manager locally and debug with
your IDE, you will need to export and generate your AWS credentials to the console.
1. Generate and export AWS credentials to an AWS profile called `test_python`
```shell
awsume -o test_python prod
```
2. Edit your run configuration and add the following to the environment variables list in the
configuration itself:
```
AWS_PROFILE=test_python
```